Bridal Hangers

Brides you know that getting married is one of the most special times
in your life. Every aspect of the day needs to be just perfect. You
want all of your wedding party set and ready to go, the cake just
perfect, and the band ready to play.

When the day begins and the photographer’s camera begins to flash, you want to be set and ready to go! You really do not want to start off the
wedding photos with your lovely wedding gown hanging on a plastic
hanger from the bridal shop! It is important not to leave our your
bridal party too!

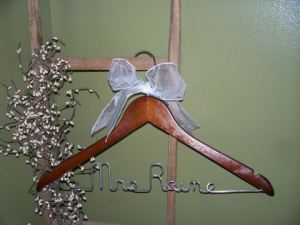
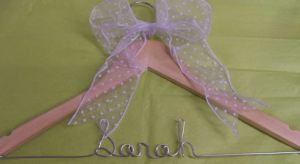
How cute would the photos be to have all of your dresses hanging on personalized wire hangers? I know for a fact your photographer will
appreciate the awesome photo props as well. What a wonderful gift idea
this would be for your bridesmaids and even your flower girl!

Personalized hangers make a nice keepsake for after the day. More details may be added to the wood part of your hanger, including the
bride and grooms name and the date. You may also have them painted with
a theme to fit your wedding and your colors. How special this will be!

Remember too, that wood hangers make excellent garment hangers. They are not only beautiful, but sturdy too!

Amy

Leave a Comment

What’s New?

I offer a variety of styles and designs for my personalized wire hangers.  The wood part of the hanger can remain plain, or be the canvas backdrop for my artist ability.  Even though their is not a lot of room, a spray of flowers or even a beach scene can be painted on them.

If that is not your thing, you have a choice between three types of wood, natural, cherry, and walnut.  You may also have color added to your hanger and in addition to that, further personalization can be done.  Having the bride and groom’s names along with their wedding date, seem to be the most popular.  Some just want the wedding date.

Creating the custom hanger that fits your needs is really up to you.  It can be plain or festive, you just need to say the word.  It is your hanger for your special day. I want it to be just that for you, SPECIAL!

Take a look at a few of my most recent additions to my shop.  I hope you enjoy them.  I’d love to hear your thoughts on them!

Amy
<a href=”http://www.aressa.etsy.com/”>Personalized Wire Hangers</a>

Comments (3)

Keepsakes for your Wedding Day

Your wedding day is meant to be one of the most special days of your life. Most people spend many months preparing for this event. It is important to make sure you make it the day you have always dreamed of, and take the time to plan to make sure it turns out to be just that.

A wonderful way to make this day affordable, unique, and classy is to add the handmade touch to it. You might be concerned about going this route, but once you see all of the special, high quality, and unique items, you surely will be glad that you gave it serious consideration.

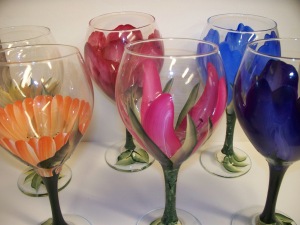
A variety of items are offered to cover just about every faucet of the day. You can even have your wedding garter set hand crafted. Other items to consider are toasting glasses, flowers, personalized wire hangers for your wedding dress. Some these items also make nice gifts for your wedding party. Many of them can be customized and personalized for the occasion.

It is a wonderful idea to provide favors for your guests. Unique and inexpensive gifts can be found on handmade sites. If you are looking for specific and are not quite finding it, consider asking for a custom design to be created just for you. This is an awesome way to have a one of a kind item for your guests.

This is such a special time in your life. Take the time to do it right. You will be glad you did!

Amy

Leave a Comment

My First Private Painting Lesson

Yesterday I held my very first private painting lesson in my home.  I have been wanting to get back in to teaching.  This was a great opportunity to do just that.

I had a wonderful time with my student.  We began by painting five petal flowers and One Stroke leaves.  Both items are great for beginners.

We just took our time and practiced a lot on each stroke.  This lesson was taught by using flat brush.  I also included instruction on how to properly load your paint brush when using the One Stroke method.  My student is going to practice and get back with me in about a month, if she wants further instruction.  She plans to paint on old furniture that she finds, with hopes of giving each piece new life and maybe even a new home!

I would love to offer my services to the surrounding Central Ohio area.  If you have a group or know of a group looking for something different to offer their members, please let me know.  I’d love to set up a project just for your needs.  I can work with all ages.  Group prices are available upon request!

Amy

Leave a Comment

Notched Personalized Hangers

Just listed yesterday! I am now offering personalized hangers with notches on them for your straps. You will have a choice between those and the regular hangers. I am hoping this will help those who wish to have a hanger created for them, but have straps that need to be considered too.

These hangers are really fun to have with your outfit to remember that special event. While you are going through the day, you think you will always remember the date and what the event was. As you get older, those memories seem to fade. This is a wonderful way to keep those special events close to your heart!

Amy
Huggable Hangers!

Leave a Comment

Wire Wood Baby’s Hangers

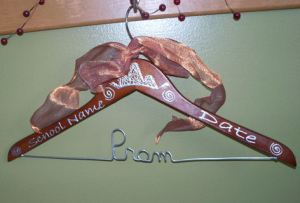
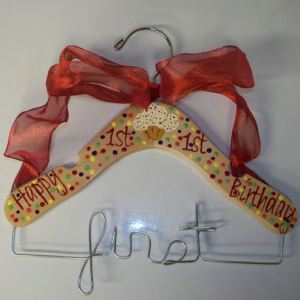
Yesterday I posted my new baby hangers in my Etsy Shop. These can be painted however you would like, for a boy or a girl. There are many occasions where these would make perfect keepsake gifts. Just think of all of the times you have special outfits or even use the cute hanger as a wall hanger. Some of the occasions that come to mind are birthdays, baptism, 1st Holy Communions, dance recitals, and even pageants. Anytime there is a special outfit to wear, buy a special hanger as a keepsake. This will help you remember the special event and date that the outfit was worn. Just keep the special outfits throughout your child’s life. No need to keep all of the rest! These also can be made in the larger sizes for older children and teens. There are other important dates and events as older children go through jr. high and high school. Think about the homecoming dances, proms, and even graduation! Put the school colors and dates of the events on the wooden part. What a great way to create memories! I do not charge extra for custom orders. I encourage them as I would want your hangers to fit your needs! Take a look! Let me know what you think. I’d love your feedback! Amy

Leave a Comment

YOU COULD GET THIS FOR FREE

ONLINE PARTIES AND BRIDAL REGISTRY/BRIDAL SHOWERS: I am now offering a online parties, bridal registries, and showers. If you are a bride to be or someone who would like to host an online party, please convo me through Etsy, or email me at: aamilou@aol.com. I will give you a special code to use and have all of your guests use when they make their purchases. We will set up the dates for your show to run. As the hostess you will receive 20% of your total orders (Minimum sales amount must be at least $100.00), less shipping and tax, to apply toward free products. As the hostess or bride to be you will also receive the benefit of purchasing at wholesale prices for the party. This is a great way to get some of the items you would love to have, for free or at a discount. This is a great opportunity for the upcoming holiday shopping season. Your party may include items from my all of my shops:Take a look at this shop! , Shop here too! , and custom orders welcome too!

AmyWork for today 92009 001

Leave a Comment

Creating a Strie

Do you have walls with a lot of imperfections? Maybe you tried to remove old wallpaper and your walls were left damaged after that process? Faux wall treatments are a great way to restore beauty to your walls, at a minimal cost.

The technique I will discuss here requires lightweight joint compound, a large 12″ taping knife, wallpaper brush, and a small brush with the bristles cut short. If you would like to add your paint to the compound you may do so before starting the job. I normally just paint the walls after the joint compound has cured.

Prepare your walls by removing light switch and outlet covers. I would strongly recommend taping your woodwork around the doors, floors, and tape your ceiling. This will save clean up time after the technique has been completed. Make sure you use drop cloths to protect your floors. This project could be a little messy.

If you are going to add your paint before your begin, make sure you add it to the entire amount of compound you will be using. This will help to ensure your color remains consistent throughout the process. Make sure you mix it well. You might want to use a drill with a special piece attached just for mixing paint and similar liquids.

If you are not adding paint, your joint compound will typically dry white with a chalky sheen. I would recommend painting the walls once the compound has dried completely. This will make it easier to clean and will help protect the walls.

Work in sections sizes that you will be able to comfortably manage. I would apply the joint compound in small sections, run the brush through it and then move to the next section, unless there are more than one person doing the technique with you. It would be perfect to have one person apply the compound while the other one creates the texture.

You will begin by coating your surface with the joint compound. You will be using the tape knife to apply the compound to your walls. Skim the coat on the wall in a relatively thin fashion. It does not have to be perfect, but you do not want it to be thicker in some areas than in others. If you maintain consistency at this point you will obtain a nicer look.

The next step calls for the wallpaper brush to be used. Again, remember to work in small sections. Start from the top of the wall near a corner, pulling the brush from the ceiling down past the middle of the wall. Clean out the brush and proceed to repeat this technique, but this time you will start at the bottom pulling the brush up to meet and blend in the middle where you left off.

Use the small brush with the cut bristles when you need to fit in to tight spots. It is also a good tool to use when you are trying to fit in to the corners. It may also be used to clean up any access joint compound.

I would recommend allowing the joint compound to dry completely for at least 24 hours before you paint it. If you have added the paint already to the compound, still allow for drying time before you hang pictures and other home decor items to your walls.

If you are in doubt about being able to complete this technique in a pleasing manner,
go through the extra expense of buying practice boards. This treatment is harder to correct than just painting. I cannot say all you have to do is re-paint it. That will not do the trick. Practice before moving to your walls. You will be glad you did.

Amy

Leave a Comment

Sponging Your Walls

Sponging is probably one of the most well known faux techniques. Many are probably familiar with using a sponge to apply paint to the wall, but it may also be used in the reverse technique of removing paint. Create a neat look with one color or multiple colors.

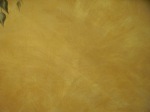
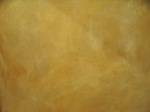
The pictures attached show a wall base painted with semi-gloss paint. The paint used for the sponging was the same color, but a flat paint. This technique can be used to create a foiled look too. It is amazing how different the paints look, being different sheens, but the same color.

This is another technique where you will dilute the paint being used for sponging. You may be able to get away with only using a quart. Just remember if your paint begins to thicken, add more water. This will keep the paint from looking
like a blob on the wall.

Add a little water and stir the paint until thoroughly mixed. Keep adding water and stirring a little at a time. It is always easy to add more water than to correct it if you add too much. Your goal is to have an inky consistency.

Place a little paint on a plate when you are ready to begin. Wet your sponge and make sure you squeeze out the excess water. Place the surface of the sponge on top of the paint. Just get the paint on the surface, do not drench the sponge. You may want to tap the sponge on wadded up paper towels to make sure you remove the excess paint before place on the wall. Remember to change the position on the sponge often so that you will create a random look.

When you place the sponge on the wall, make sure you do not cover the paint underneath entirely. Start from the top and work your way down. Do not paint in a straight line down the wall. Move the sponge in small section. If you want to add another color, just repeat this step. If you feel the need to bring more of the first color out, sponge with that color again. It is important that you continue around the room and finish each color out before moving on to the next. This will keep all of the walls looking similar. If you try to finish one wall at a time when using multiple colors, it is very unlikely they will look the same. Also, if someone else is helping you sponge, make sure they do all of one color as you are doing all of another.

If you would like to do the reverse painting technique and use the sponge to remove the paint, paint the second color over the base color in small sections. It is important to work in small sections and in random areas as you move from the top of the wall to the floor. Once you have painted the second color in the small section, immediately place the sponge in the painted area and pull away from the wall. Repeat this, moving the sponge in different directions to avoid a creating a definite pattern. Once you have done this to the entire painted section, paint another section and repeat this process.

Depending on the look you are trying to achieve, there are many ways to do the sponging. There really is not a right and wrong way to do this. I would recommend practicing on small practice boards before moving to the wall. Remember, if you do not like the finished product, all you have to do is paint over it and start again. It really is just that easy!

Amy

Leave a Comment

Ragging Your Walls

Ragging is another easy faux treatment that may be used on many surfaces, including your walls. Turn your walls from plain to beautiful using a few different colors of paint, a few rags, and a paint brush. It really is as simple as that.

This painting technique may be painted over any type of sheen, but works well over semi-gloss and 100 % acrylic paint. In this technique, much like the color washing you will dilute your paint. This will allow the base color of the walls to show through.

Begin by diluting both shades of paint you are going to use in this technique. I normally choose two colors, but you certainly may use more if you like. I begin by choosing colors to coordinate with the base coat. In the sample given you will see a carmel brown. A slightly lighter golden brown color was chosen along with a white.

Start in a corner like you would the color washing technique. You will place a small amount of each color on the walls using a paint brush. Try to work in small areas at a time. No larger than about two feet in diameter. Do it in random shapes to avoid creating a pattern. Start at the top of a wall and move down toward the flower.

After you place the two colors of paint on the wall, pull some of the paint off the wall by placing the lint free rag on the painted area. You place it in the painted areas and pull straight up from the wall. Move your rag in different directions to deviate the design.

Rinse out the rag and ring it out well once it becomes too saturated with paint. This will allow your rag to pull the paint and create interesting designs. You may always add more paint to the walls if you do not like the look created.

As you continue to move around the room, your paint will start to thicken up. Add water to keep the inky consistency of the paint. If it gets too thick it will look more like a blob on the wall. You want to create visual interest. Your paint will be heavier in some areas, that’s okay, but you do not want it to look like it was put on too heavy in one spot. It should be pleasing to the eye.

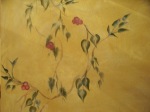
This is also a wonder technique to add further decorative painting to it. Hand painted vines and other designs look nice with faux painted walls. It really is an affordable way to add to your home decor or office decor, without spending a fortune.

Always remember, if you try it and do not like it you just have to paint over it. You never know, you just may love it! Surprise yourself and give it a try.

Amy

http://www.aressa.etsy.com2nd Shipment of Dog glasses 90309 projects 0242nd Shipment of Dog glasses 90309 projects 0252nd Shipment of Dog glasses 90309 projects 0262nd Shipment of Dog glasses 90309 projects 0272nd Shipment of Dog glasses 90309 projects 028

Leave a Comment

Older Posts »